
Tree Trimming Tips

I’ve decorated many trees over the years – one of which even sold in a charity auction for six thousand dollars! I’ve done the ‘Candycane Lane’ look, Jewel Tones, the Winter White, the Metallic Masterpiece… and everything in between. It’s amazing how many looks you can create with your Christmas tree! Today I’m sharing this year’s main living room tree, along with tips from how I styled it.

I just may officially be a ‘Crazy Christmas Lady’, because this year, we have 5 trees up in our house! I will undoubtably regret that decision when it comes time to take them all down lol… but until then, our family is enjoying the warmth and comfort of the twinkling lights in the home.
The main tree is located in our living room – right front and centre in our bay window. Since we got to explore everyone’s ‘themes of choice’ with 4 other trees, I did not hold back on adding my signature ‘Kyla style’ to this tree. It’s grand, it’s pink and filled with all of my favourite ornaments. Here’s how I put this look together.

OH, CHRISTMAS TREE
Let’s begin with the tree itself. This stunner was passed on to us by my in-laws and it’s very special to me. When they originally bought it, the flocked look was brand new and it was - and still is - quite the show-stopper. I love tradition at Christmas and the fact that it was passed on with the memories or earlier Christmases is sweet.
These days, you can get flocked trees of all kinds. You can even get fresh trees flocked at some of the local garden centres. Though, unfortunately this year there is a fresh tree shortage.
I was raised in a ‘faux tree home’, and have become a faux tree kinda gal myself. I prefer the convenience of faux trees and I also like how you can manipulate the branches to fit ornaments.
Pro tip, I also like to manipulate the branches, arranging the mini bulbs to shine where I choose. This maximizes the glow and lights up the ornaments. I highly recommend pre-lit trees and taking this extra step to make the lighting pop.

Starting with sprigs
If I were decorating in a traditional style, at this point I would add a beaded garland and swag it thoughtfully from branch to branch. Then, I would traditionally loop in 2 foot long strips of cascading wired ribbon to create a layered in garland look. This would also be the time to place bows.
This year, the tree is anything but minimalistic, but I have scaled back on the number of ornaments I’ve used and added in tons of floral sprigs instead. The final look is one of grandeur and whimsy. It’s positively packed with sprigs of all kinds. In essence it makes the tree become a life-sized floral arrangement.
Adding sprigs can completely transform a basic tree, letting you dress it up with a different look year by year. Sprigs provide texture and transformative fullness. If you are looking to add sprigs, I would recommend at least 12 pieces of secondary foliage. To achieve this look, you’ll want about 30-40 pieces of various floral and branches.
I have included draping metallic branches, pearl beaded branches, and three different types of poinsettias layered in with icy, sparkling pink cherry blossom branches… as well as some various other pieces throughout.
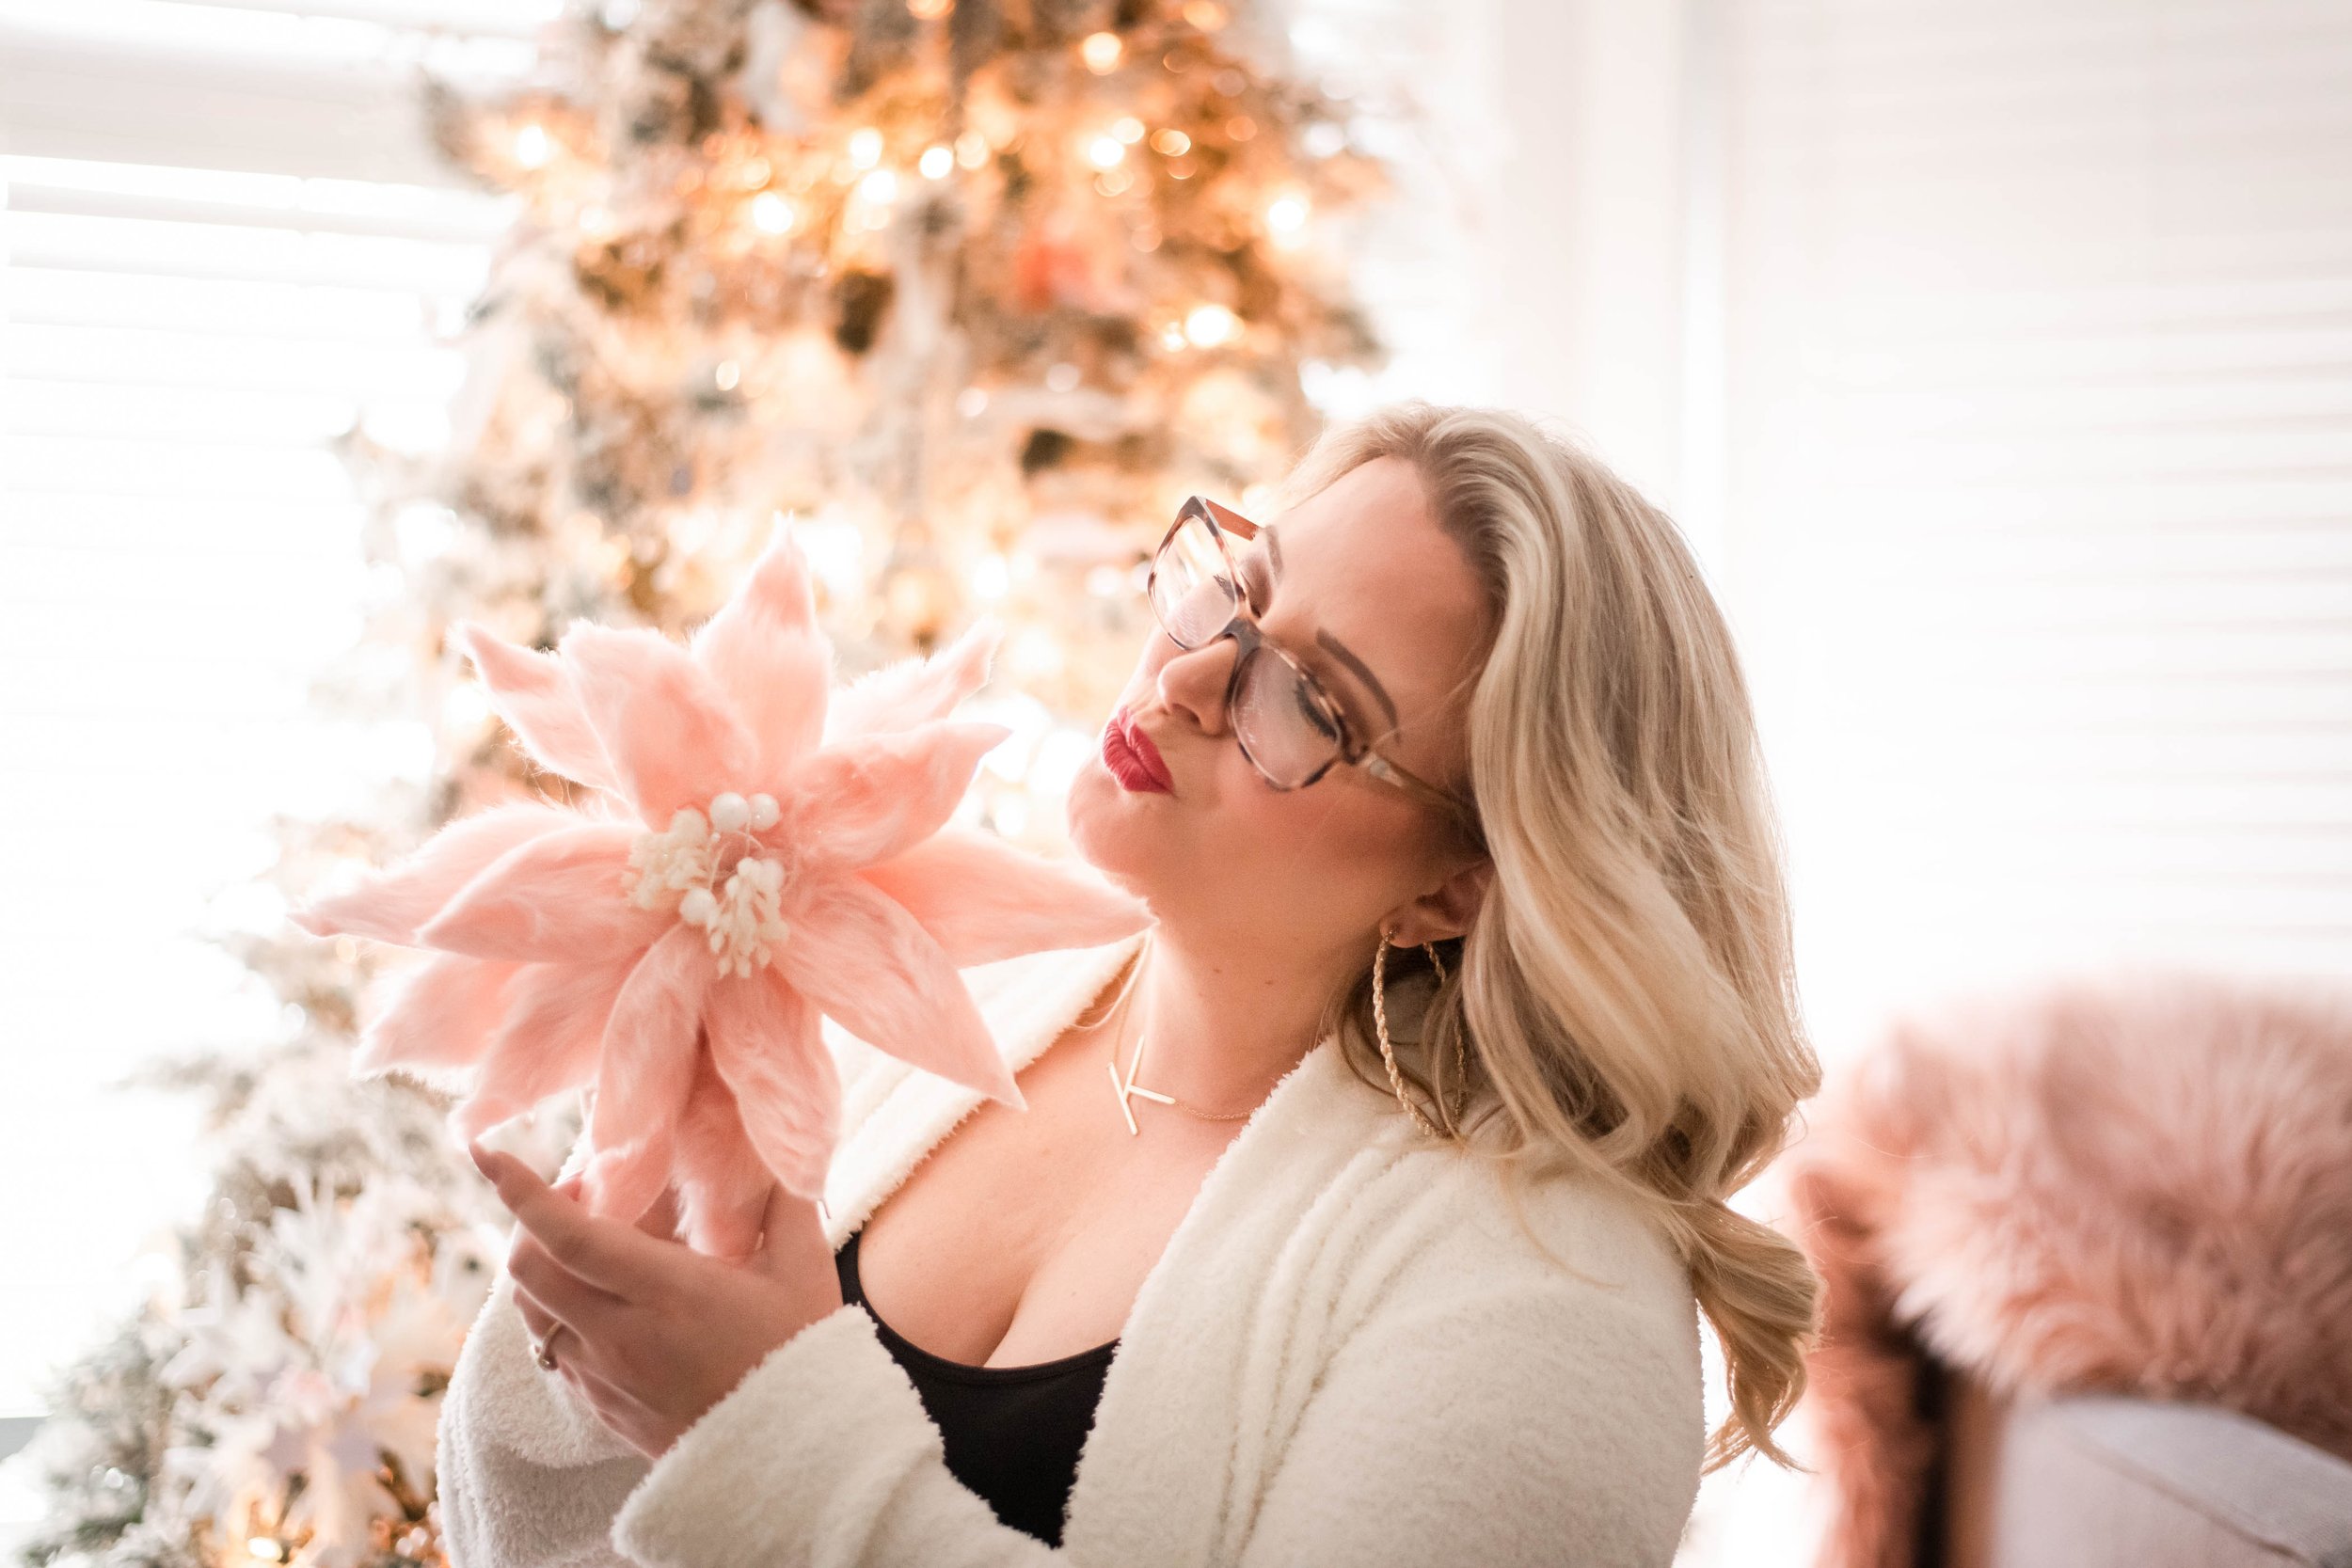
Poinsettia Power
I’ve always loved poinsettias. When added to the tree, they can create a lot of impact because of their large size and grand appearance. I have collected three different poinsettias over the years, and opted to use them ALL together in this tree. My favourite are these blush pink fur blooms that I got from Potters. I also have matte white blooms with sparkling centres and ones with white and icy silver crystal-coated petals.

Statement Ornaments
When it comes to ornaments, I choose some for repetition throughout the tree, and other singular pieces to tell the story of the theme. I often find myself using snowflakes or traditional balls as my repeated ornaments. In floral design, there is a rule (loose guideline) of using odd numbers. The triangular shape of the tree also lends itself to having ornaments added in odd numbered groupings. If you find an ornament you like, I suggest purchasing them in sets of 3, 5, 7, 9…. etc. Then equally space these common pieces around the tree keeping a triangle or star shape in mind so that they are spaced out nicely.

Colour Story
Choosing a colour scheme is another fun part of planning out your tree, and there are no rules – you are the designer! One thing that you may want to consider in your designing journey is how much contrast you’d like to create with your tree. This is a personal preference! Remember, the more contrast, the more noticeable your decorations AND your spacing will will be.
If the branches are white - a dark burgundy ornament is really going to stand out, whereas a mercury glass ornament is going to add subtle tone and a sparkling white ornament is going to blend in and create fullness and soft layered detail.
If the branches are deep green, white ornaments are going to pop. If the branches are flocked, ornaments are more likely to blend in unless you use vibrant colour.
There is no right or wrong way to map our your colour scheme, although personally I tend to like to ensure there’s a range with shades that pop and mid-tone shades that tie it together for a fuller look. Metallics are great for this… they also reflect light which is always beautiful and pleasing to the eye.


Don’t just skirt it, dress it!
I have to thank my 7 year old Kadence for this idea. She started to place my village below the tree and proceeded to play with her Barbies there while I decorated. Aside from the fact that she would be quite upset if I moved them, I realized what a fun idea it is to dress up the base of the tree in this way. We have often talked about getting a train to run around the bottom of the tree, and how sweet to create a village scene!
I have a couple of tree skirts, but I find that skirting is a trend that changes quickly and I’m not seeing traditional cookie cutter skirts on trees as much this year. For some reason, I always have a hard time spending money on tree skirts by the time I have decorated the tree. I have taken to loosely drape material around the base of the trees and I love the how it comes off. #1 - I’m better able to hide the base and cord. #2 - The thickness and texture balances with the tree above. #3 - It’s effortlessly chic. #4 - It’s exudes coziness at your feet. #5 - My favourite - I can use blankets or tablecloths that I already own OR if I do invest in purchasing a blanket for this, I can use it throughout the year or as a blanket in the future.

For the village scene, the houses were purchased at Homesense, The Cross and Little White House over the years. I set them atop a white tablecloth and added fluffy cotton snow to the entrances to ground and layer them into their spots with some texture. I added a few additional trees and these cute white deer which were tree ornaments from the local dollar store. Voila! I couldn’t be happier with this year’s tree and the scene below.
Follow along @kylagettyliving on instagram for more of a look into my everyday home and life and make subscribe to receive my free eMagazine.
Happy Holidays!
xo
